How to Make Dairy-Free Yogurt at Home Easily
Making dairy-free yogurt at home can be a fun and rewarding experience. It allows you to enjoy a healthy treat that aligns with your dietary restrictions or preferences. To start, you’ll need some basic ingredients and kitchen supplies. Gather the following items: non-dairy milk, preferably almond, coconut, or soy; yogurt starter culture, which you can purchase from stores or online; and optional sweeteners, like agave or honey. Additionally, have a clean, airtight container ready for storing your yogurt. Making your own yogurt ensures it’s fresh and free of preservatives, sugar, or additives found in store-bought options. Experimenting with different non-dairy milks allows for a variety of flavors and textures. Avoid those with artificial ingredients and focus on natural brands. Making yogurt can also be a great way to introduce beneficial probiotics into your diet, supporting gut health. The process is fairly simple and involves heating the milk, cooling it down to the right temperature, adding the starter, and letting it ferment for several hours. Ready to dive into the homemade yogurt journey? Let’s explore the steps involved next.
Ingredients for Homemade Dairy-Free Yogurt
Now that you’re set for the adventure of making dairy-free yogurt, let’s dive into the ingredients you will need. First and foremost, select your non-dairy milk; almond milk is a favorite due to its creamy texture and mild taste. Alternatively, coconut milk can yield a thicker yogurt, reminiscent of traditional styles. Soy milk is another option, often boasting higher protein content. Next, you’ll want a yogurt starter culture, which contains active probiotic cultures. If you’re unsure where to find one, they are readily available in health food stores or online marketplaces. Look for options labeled as dairy-free to ensure compatibility with your yogurt project. You might also want to add sweeteners like maple syrup or vanilla extract for flavor, so gather those as well. You can sprinkle in various fruits or spices to enhance your yogurt further, such as berries, cinnamon, or even a bit of cocoa powder. Preparing these ingredients ahead of time will streamline the entire process and make your yogurt-making experience enjoyable.
Before you start the yogurt-making process, it’s crucial to prepare your kitchen tools and ensure cleanliness. Start by sterilizing all the utensils and containers you’ll use, as any unwanted bacteria can interfere with the fermentation. While commercial yogurt is usually packed with preservatives, making your own ensures that what you consume is natural and fresh. Begin by pouring the non-dairy milk into a saucepan and heating it gently over low-medium heat. Stir frequently to avoid scorching. Heat the milk to about 180°F (82°C) to help eliminate any unwanted bacteria; this step is especially important for homemade alternatives. After heating, remove it from the heat and let it cool down to around 110°F (43°C), ensuring the starter culture remains viable when added. Patience is key, as this cooling process often takes about 20 to 30 minutes. Keeping everything organized and tidy will help the entire process go more smoothly and prevent surprises later on. Once the milk has cooled sufficiently, you’re ready to continue to the next exciting step of adding the starter.
Fermenting Your Yogurt
Now that your non-dairy milk is prepared and has cooled to the appropriate temperature, it’s time to add the yogurt starter culture. Sprinkle one or two tablespoons of the starter into the warm milk and gently stir for about 30 seconds to mix it well. This initial mixing is vital, as it allows the probiotics to disperse evenly throughout the milk. Once mixed, transfer this mixture into your clean, airtight container, which should be glass or ceramic rather than plastic for best results. To create the right environment for fermentation, cover the container tightly and place it in a warm, dark location. An oven or a yogurt maker can work wonderfully, or wrap it in a towel to insulate. Fermentation typically takes about 8 to 12 hours, depending on your desired thickness and tartness. Check the yogurt occasionally, but avoid opening the container frequently to maintain the temperature. After fermentation, you’ll notice a distinct change in texture and taste. It’s an exciting point in this homemade yogurt adventure!
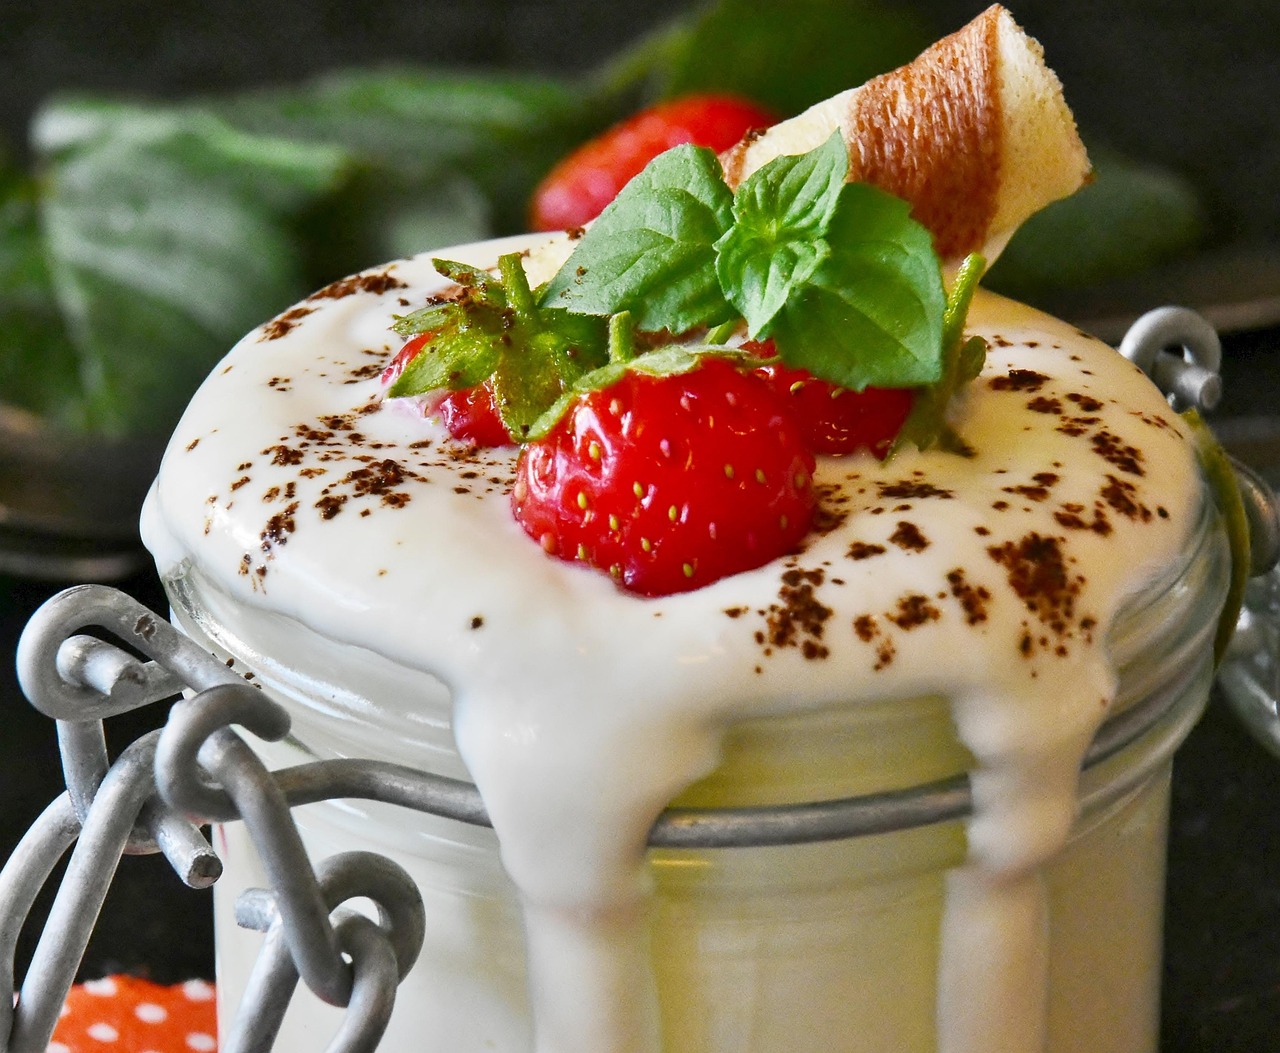
Once the fermentation period is complete, it’s important to check the yogurt for taste and consistency. Remove the container from its warm spot and gently uncover it, taking care to observe any separation of whey, which is normal. If you prefer a thicker yogurt, consider straining it using a nut milk bag or cheesecloth. This allows you to achieve that delightful Greek yogurt consistency, perfect for layering or topping. Note that straining will also remove some of the whey, which is packed with protein and nutrients, so save it for smoothies or baking. If you enjoy a sweeter flavor, now is the perfect time to stir in your desired amount of sweeteners, such as maple syrup or agave nectar. You can also fold in fruit purees or fresh berries for added flavor and texture. Homemade yogurt is incredibly versatile, opening the door to various toppings and mix-ins. Store your finished dairy-free yogurt in the fridge, where it will typically keep for about a week, maintaining freshness and quality.
Customizing Your Dairy-Free Yogurt
Customization is one of the best aspects of making your dairy-free yogurt. With so many possibilities, you can personalize flavors and textures according to your tastes. For instance, you can add fresh or frozen fruits like strawberries, whipped bananas, or subtle hints of vanilla. Experimenting with spices such as cinnamon, nutmeg, or even a hint of cardamom can create layered flavors with each bite. If you prefer a more tropical flair, consider adding pineapple or coconut for a refreshing twist. Sweeteners also provide room for creativity; honey, maple syrup, or agave serve as great options, but you can also try using stevia or monk fruit for low-calorie alternatives. Additionally, you might decide to blend in superfoods, such as chia seeds, flaxseeds, or hemp hearts. These not only pack a nutritious punch but also enhance the texture and health benefits of your yogurt. Get adventurous and try combining different flavors over time to find your perfect dairy-free yogurt blend that suits your dietary needs and preferences!
Remember, practice makes perfect when it comes to mastering dairy-free yogurt making. Don’t be discouraged if your first attempt isn’t exactly how you envisioned it. There is a learning curve, and experimenting can lead to even better results. The beauty of homemade yogurt lies in its adaptability; if one batch doesn’t turn out as expected, you might learn what changes to make in your next attempt. Keep records of what works and what doesn’t to further refine your process. Try different fermentation times, alternative starter cultures, or even varying quantities of sweetness to explore what creates the perfect balance for your yogurt. You can find inspiration and community advice in numerous online forums and recipe websites specifically focused on dairy-free cooking. Sharing your journey with others can motivate and inspire new ideas. Enjoy the creativity of transforming simple ingredients into a delicious, healthy, privacy-conscious dairy-free yogurt that satisfies your cravings and nourishes your body.
In conclusion, making dairy-free yogurt at home is a delightful journey worth exploring. With a few simple ingredients and methods, you can create personalized, wholesome yogurt that aligns perfectly with your dietary choices. This process not only provides you with a delicious treat but also empowers you to experiment with flavors and textures you truly enjoy. Join the growing movement of health-conscious individuals who are embracing homemade options that promote wellness and creativity. The satisfaction of discovering new ways to enjoy yogurt without dairy leads to exciting culinary adventures in the kitchen. So why not start today? Gather your ingredients, follow the outlined steps, and dive into the world of dairy-free yogurt making. You may be surprised by how much you love the process, and soon enough, you’ll be sharing your yogurt delights with friends and family. The journey of crafting yogurt might just open doors to various other healthy recipes that cater to your lifestyle choices. Happy yogurt making!